
It encroaches on the season to be spooky. Or in my case, it encroaches on the season to slightly lean into the idea of spooky but mostly lean into the cute. First up for this year… this Amigurumi Bat.
You will need:
– 4mm knitting needles – flat and dpn
– DK yarn
– Small amount of stuffing
– 2 googley eyes
– Darning needle
– Pipe cleaner
Special terms and words: knitting and purling used. Stockinette is just alternating rows of Knit and Purl (with the purl being on the inside mostly). Icord used – which is essentially 3 stitches on double pointed needles where instead of turning your work, you slide the work to the other end of the needle and continue knitting. CCD – centre double decrease. This is done by slipping 2 stitches together as if to knit, knit the next stitch, and then pass the 2 slipped stitches over the stitch just knitted. I will make video tutorials if needed.
Here is my tutorial for the icord pieces:
Wings
Cast on 40 stitches.
Knit 2 rows
Knit 8, CCD, knit 18, CCD, knit 8
Purl the whole row
Knit 7, CCD, knit 16, CCD, knit 7
Purl the whole row
Knit 6, CCD, knit 14, CCD, knit 6
Purl the whole row
Knit 5, CCD, knit 12, CCD, knit 5
Purl the whole row
Knit 4, CCD, knit 10, CCD, knit 4
Purl the whole row
Knit 3, CCD, knit 8, CCD, knit 3
Purl the whole row
Knit 2, CCD, knit 6, CCD, knit 2
Purl the whole row
Knit 1, CCD, knit 4, CCD, knit 1
Purl the whole row
CCD, knit 2, CCD
Purl the whole row
Cast off
You now have a rectangle. Optionally you can knit an icord edge to the top of it (the non-cast-on edge).
Body
Cast on 10
Knit front and back into every stitch. (20 stitches)
Stockinette stitch 15 rows
Knit 1, knit 1 front and back – repeat over whole row (30 stitches) (this is the neck)
Stockinette stitch 9 rows
Knit 1, knit 2 together – repeat over whole row (20 stitches)
Purl 1 row
Knit 2 together – repeat over the whole row (10 stitches)
Cut yarn with 30 cm of tail remaining – thread the remaining stitches onto the yarn tail and pull tight.
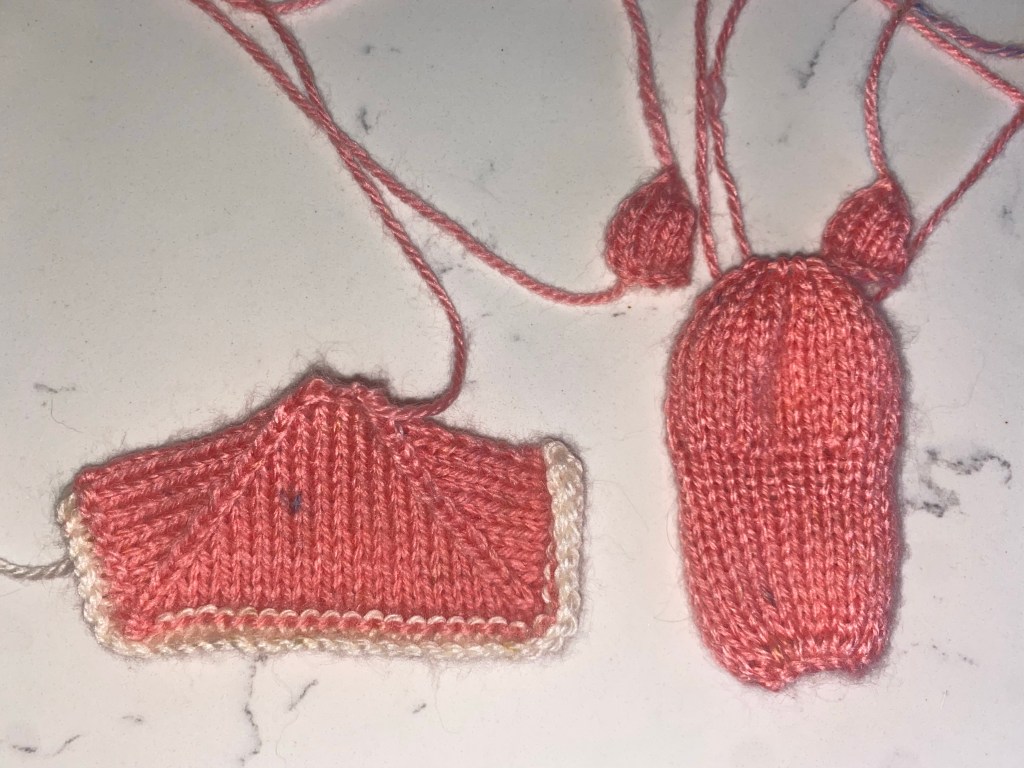
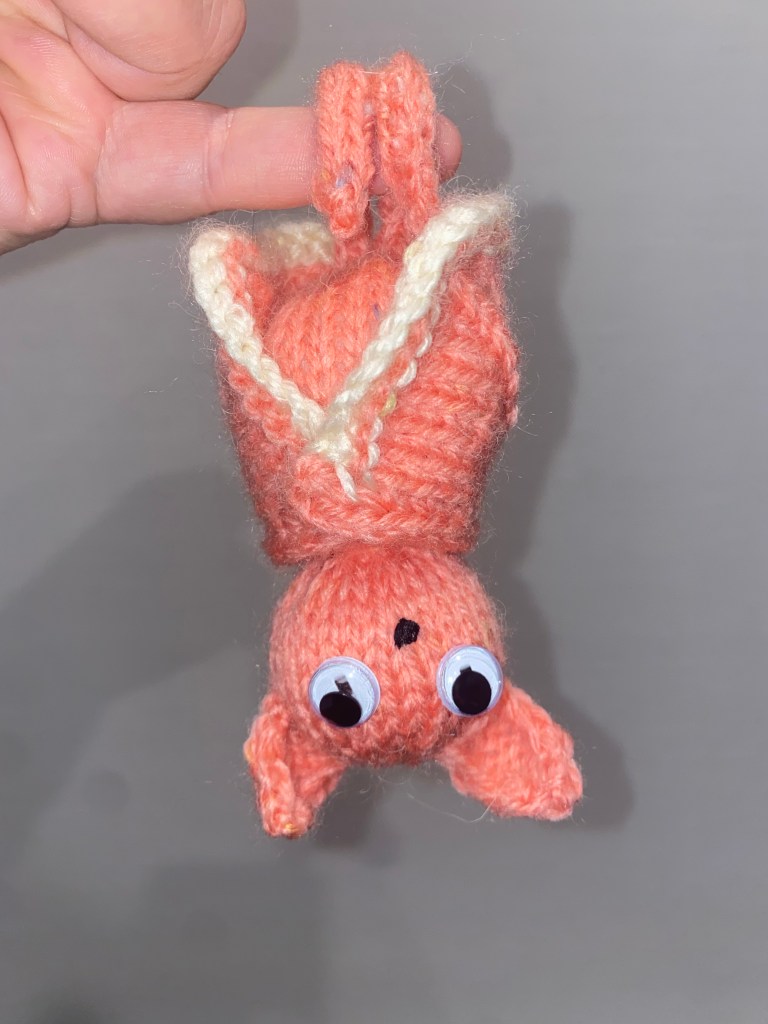
Ears – make 2
Cast on 6 stitches
Stockinette stitch 6 rows
Knit 2 together over the whole row (3 stitches)
Purl 3 together
Cut yarn tail with 10 cm remaining – thread through remaining stitch, pull to tighten.
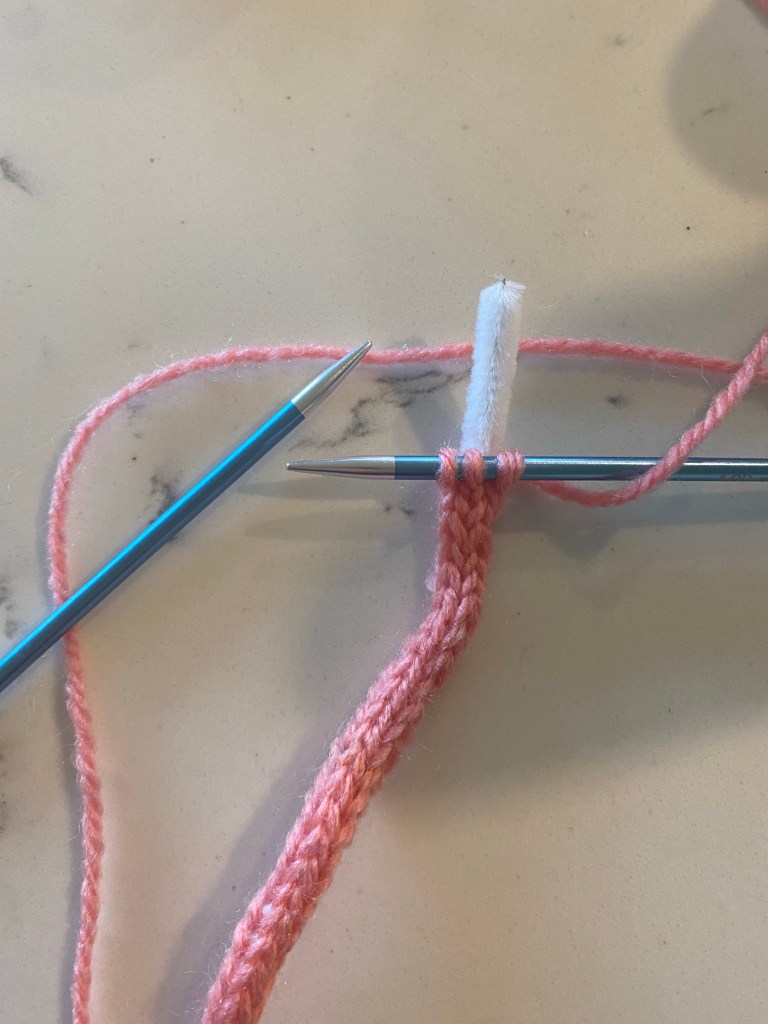
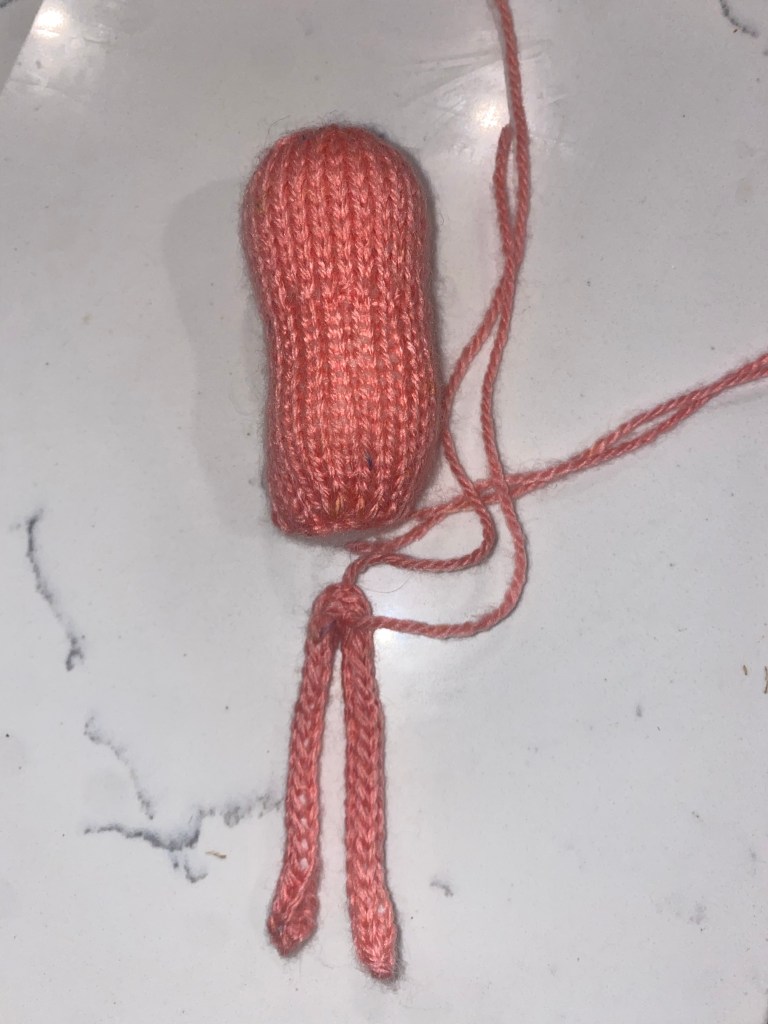
Legs
Cast on 3 stitches onto the 4mm dpn’s.
Holding the pipe cleaner behind the knitting, icord the full length of the pipe cleaner. I do this by knitting across the row and then when pulling the yarn across to start the new row, make sure this goes around the pipe cleaner enclosing it in the middle of the knitting.
Knit the full length of the pipe cleaner.
Cast off at the end. Darn in the yarn tails.
Stitching up
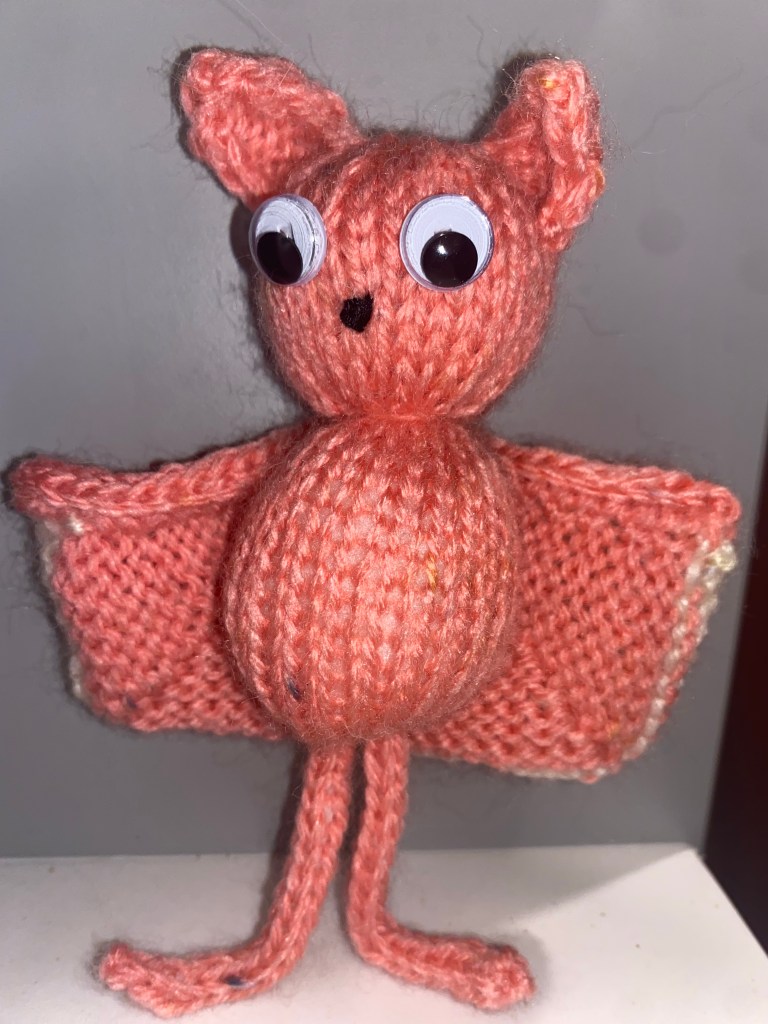
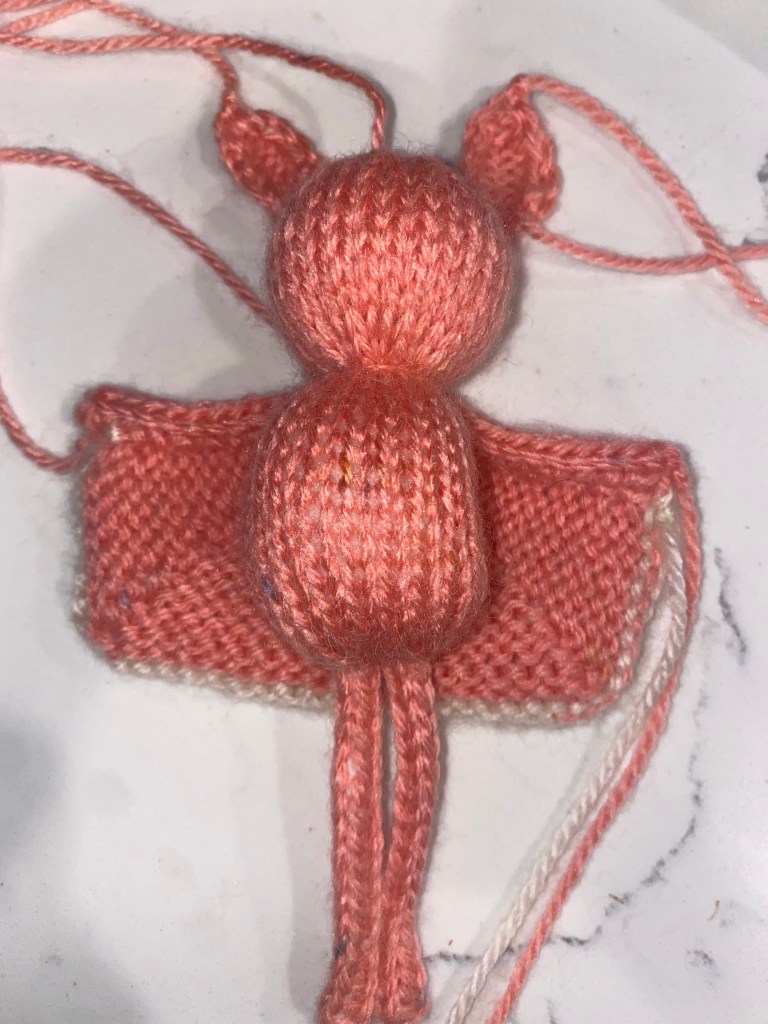
Fold the body piece in half, stitch up from the top of the head down to the bottom. This seam should be the back of the bat. Leave the cast-on edge open for now. Stuff the body firmly from this bottom opening.
Fold the legs in half. Stick the folded piece in the bottom opening. Thread the yarn tail through the cast on edge, and pull tight around the legs. Stitch the legs to the body firmly as you close up the bottom opening.
Stitch the centre of the wings onto the back of the body. Stitch the ears onto the top of the head. Darn in the yarn tails. Stitch 2 eyes onto his face, and stitch a small triangular nose onto his face.

Leave a comment