
These have been a much requested item to be completely honest. While knitting fruits and vegetables occurs sometimes, they aren’t something I usually do. However, it was time. That, and they are orange… I do like orange.

They will each take less than an hour from start to finish. You can scale them up to a larger size if you so desire… but I leaned towards a smaller pumpkin… maybe for a windowsill display later on.
There are 2 options here. One is super simple, and perfect for almost complete beginners. The second is a little harder, but still not particularly challenging because of its size. It is a good project for people wanting to try shaping, increasing and decreasing, in a low stakes way.
You will need: – orange yarn DK – 4mm knitting needles (and 2 double pointed needles) – darning needle – stuffing – scraps of brown yarn
Pumpkin 1 – Easy
Cast on 40 stitches
Knit 2, Purl 2 – repeat over the whole row as a wide rib.
Do this for 20 rows.
Knit 2 together, purl 2 together – repeat over the whole row (20 stitches remain)
Cut yarn with 30cm remaining. Thread onto the darning needle, and thread through the remaining stitches. 
Stem: Cast on 3 stitches on the double pointed needles. Icord 6 rows – knit 3 stitches… slide work to the other end of the needle, knit again onto the next needle without turning work. This makes a fairly round, thin stem. Knit 3 together. Cut yarn, thread through the remaining stitch, darn in the yarn tail.
Here is my icord knitting tutorial:
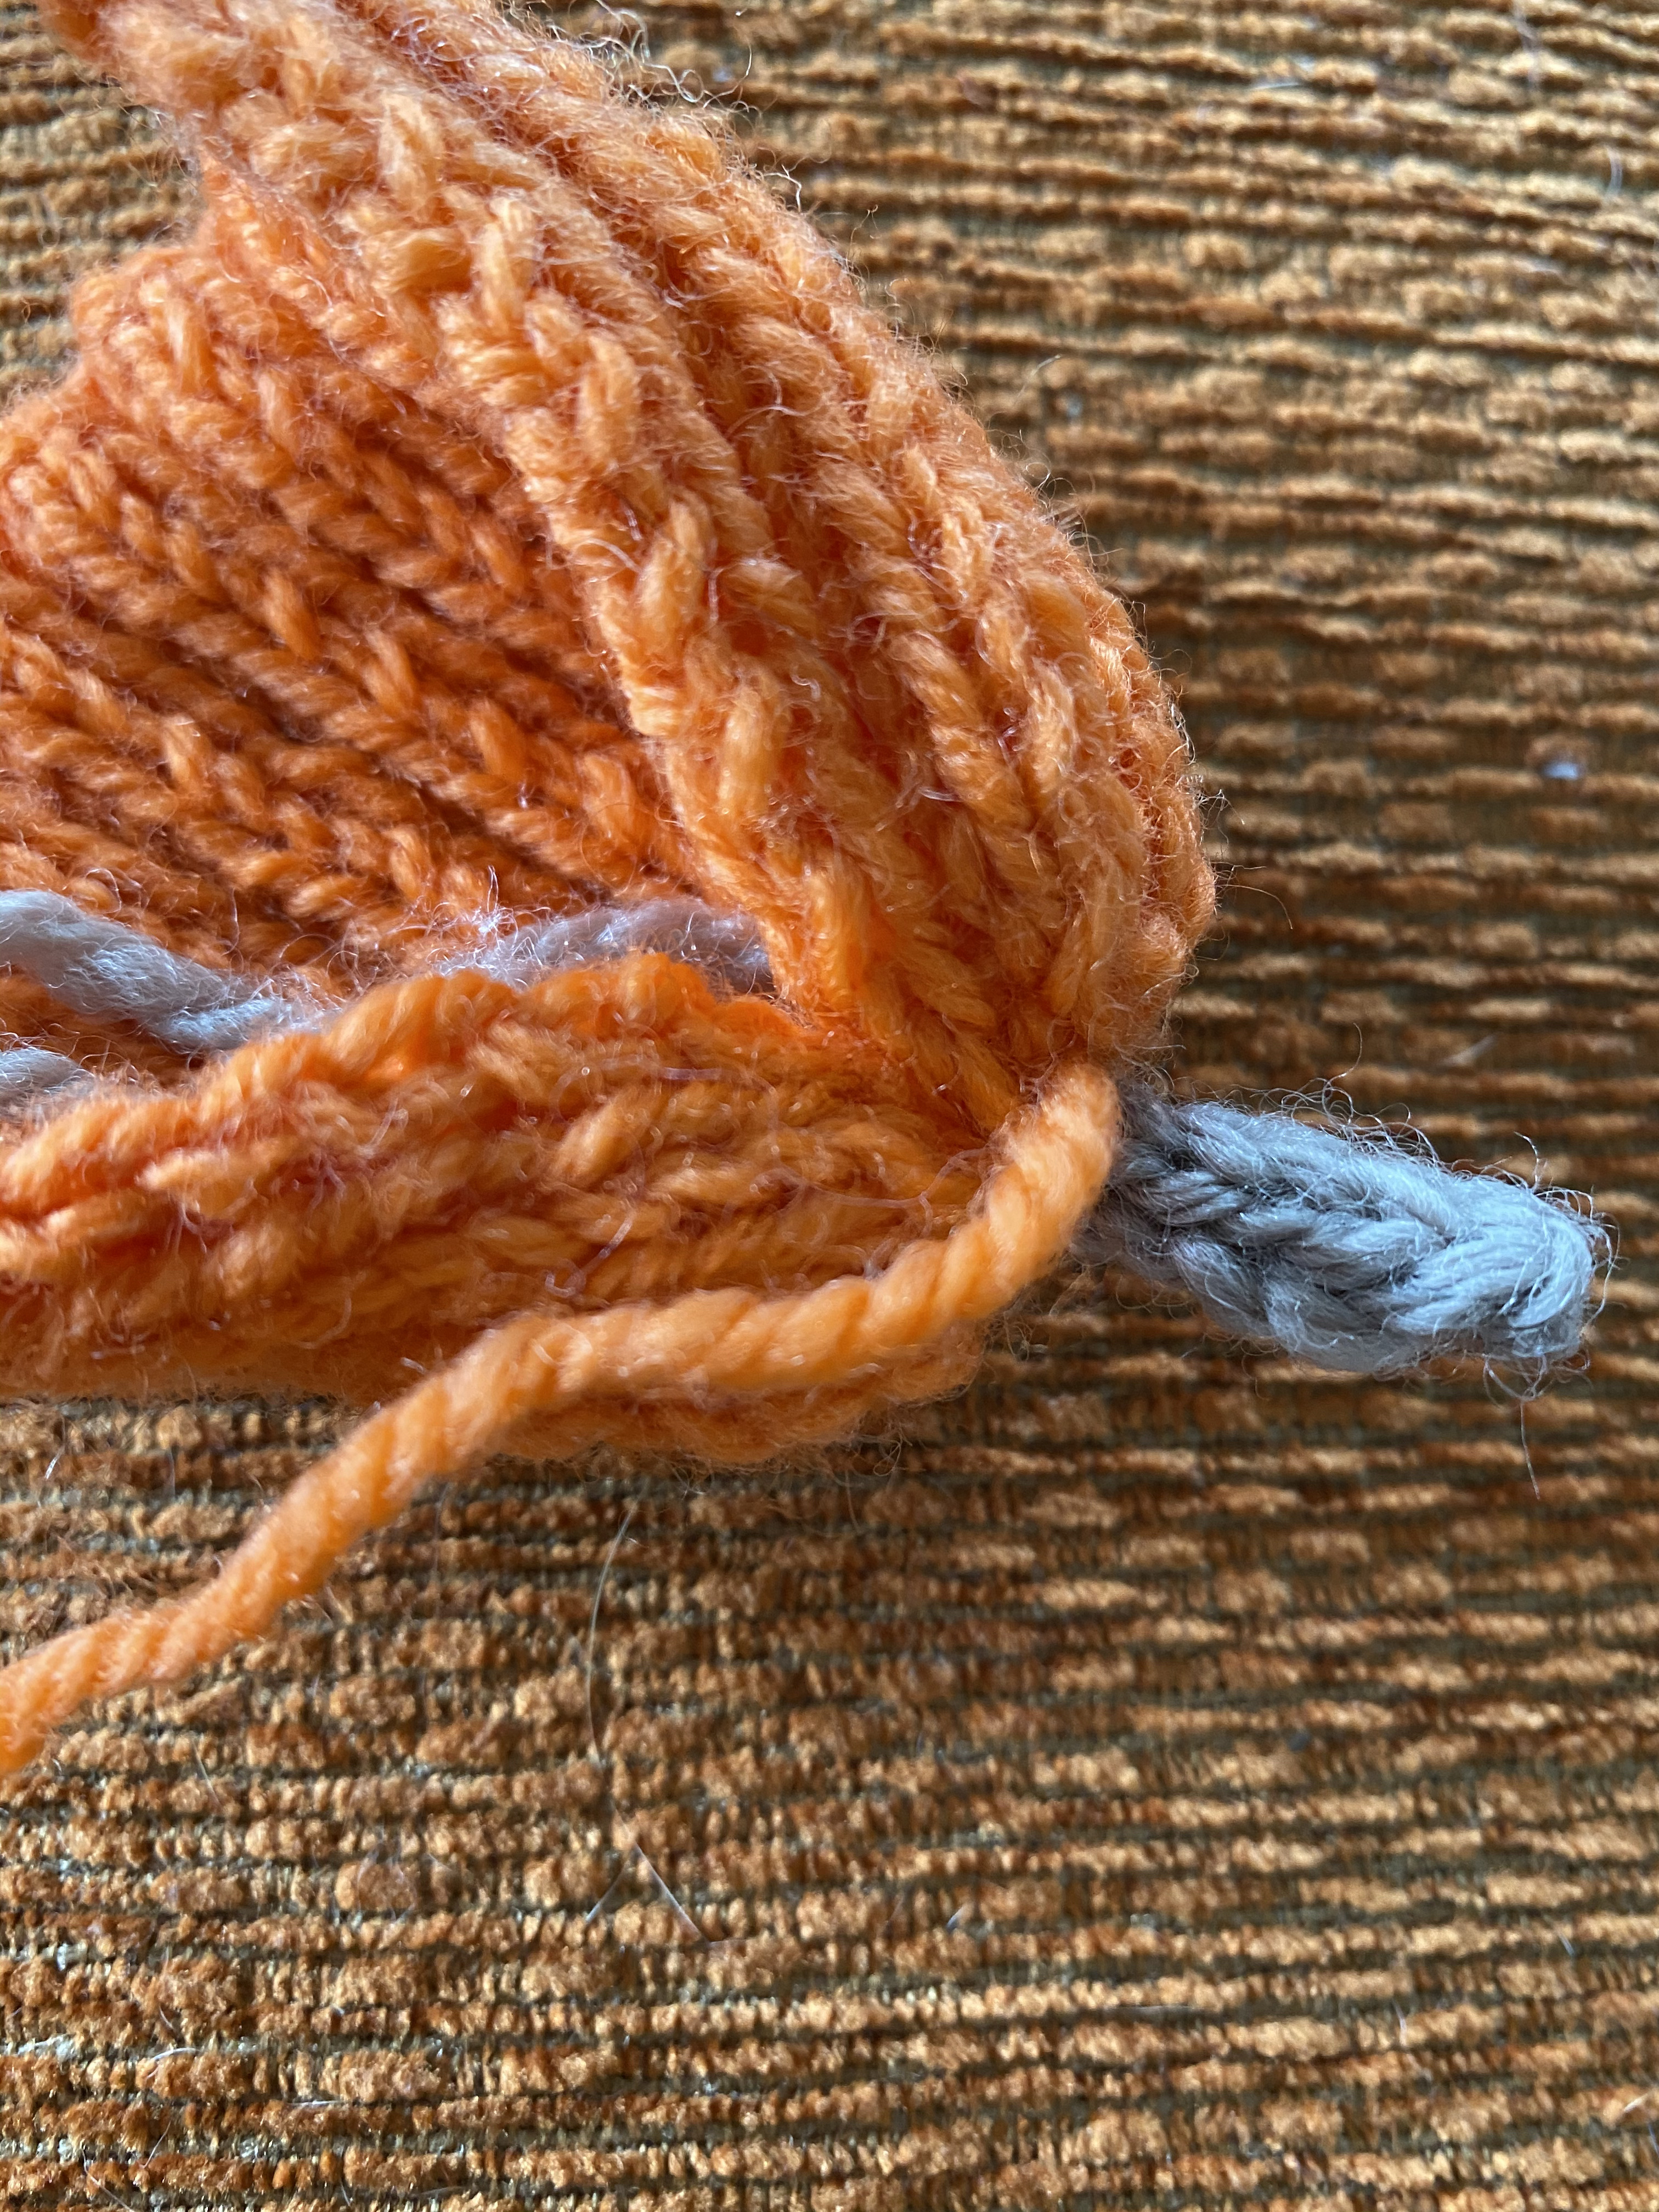
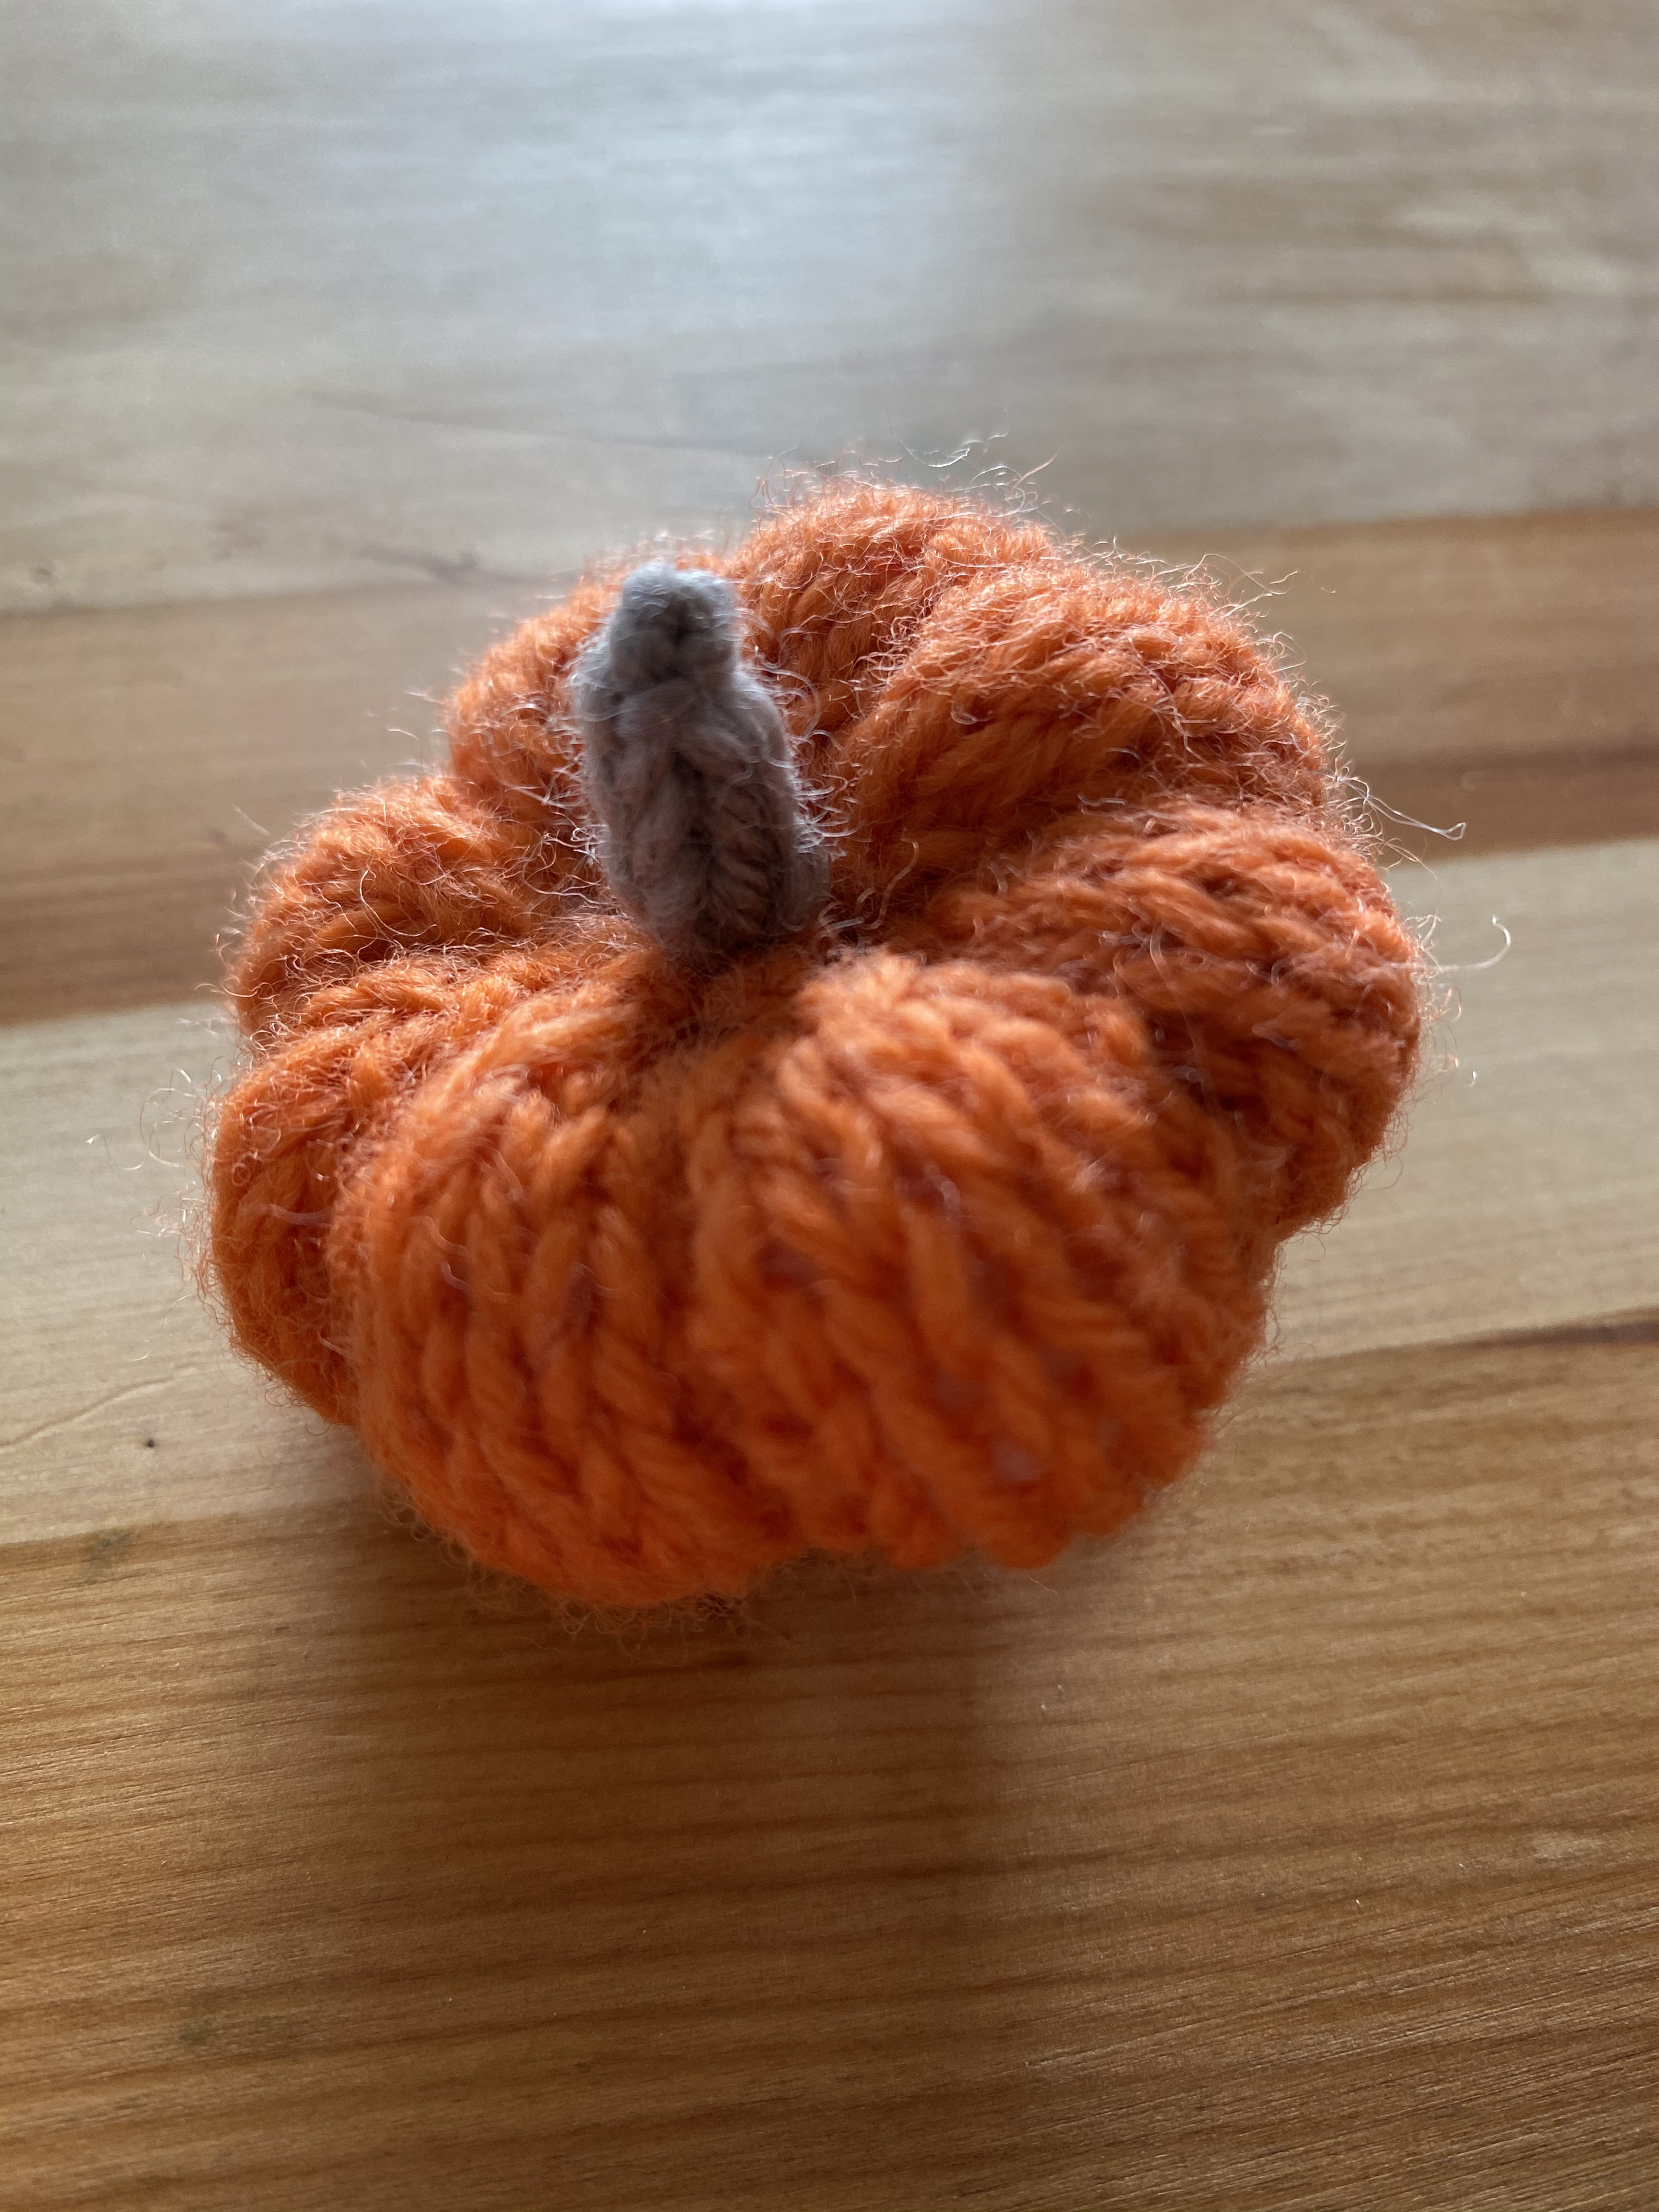
Stitch the stem to the top of the pumpkin (where you have just threaded the stitches and pulled tight. Carefully stitch up the side seam. Stuff with stuffing. Run a running stitch around the bottom of the pumpkin, and pull the yarn to close the bottom.
Pumpkin 2 – Harder
This pumpkin has had a lot of questions of late – so I have made a video tutorial to assist in making this pattern. It is available here:
Cast on 8 stitches
Knit into the front and back of every stitch – 16 stitches
Purl row
Knit into the front and back of every stitch – 32 stitches
Purl row
Knit 3, knit into the front and back of the next stitch. – repeat over the whole row – 40 stitches
ROW A: Knit 4, Purl 1 below (purl into the stitch below the one on the needle) – repeat over the whole row.
ROW B: Knit 1, Purl 4 – repeat over row
Complete rows A and B 5 times.
Knit 2 together – repeat over the whole row – 20 stitches
Purl 2 together – repeat over the whole row – 10 stitches
Knit 2 together – repeat over the whole row – 5 stitches
Cut yarn with 30cm remaining. Thread onto the darning needle, and thread through the remaining stitches. 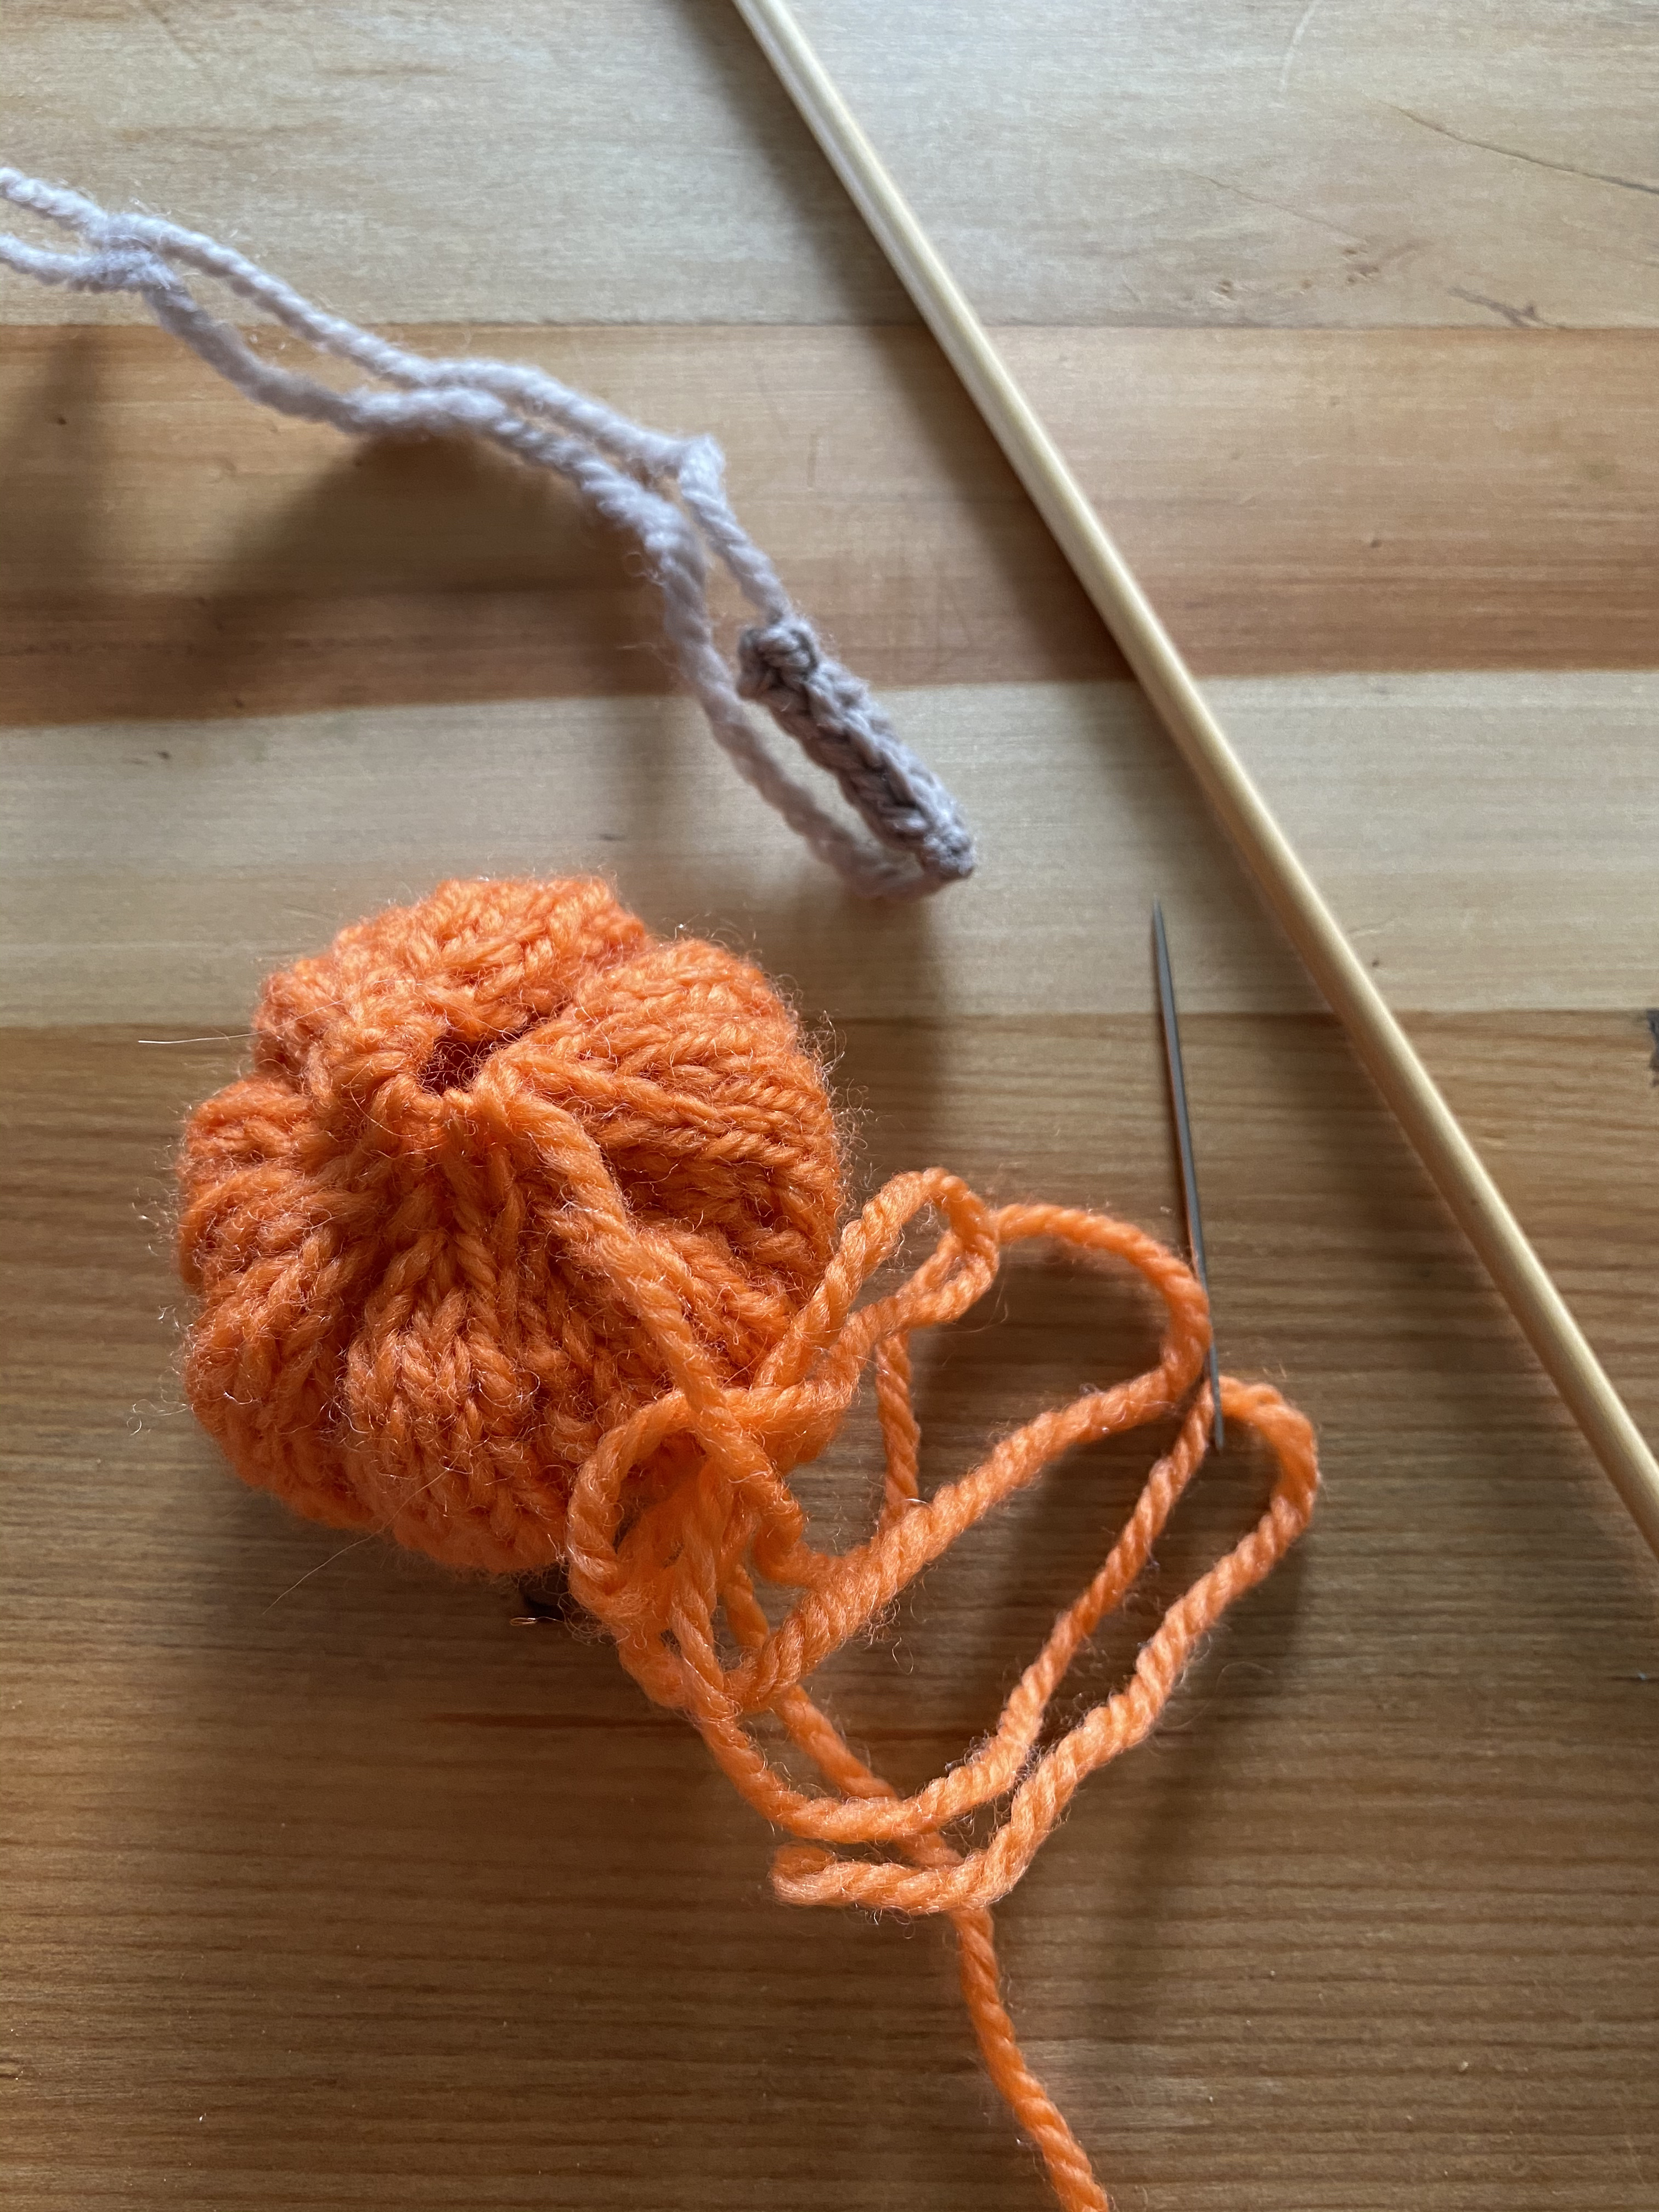
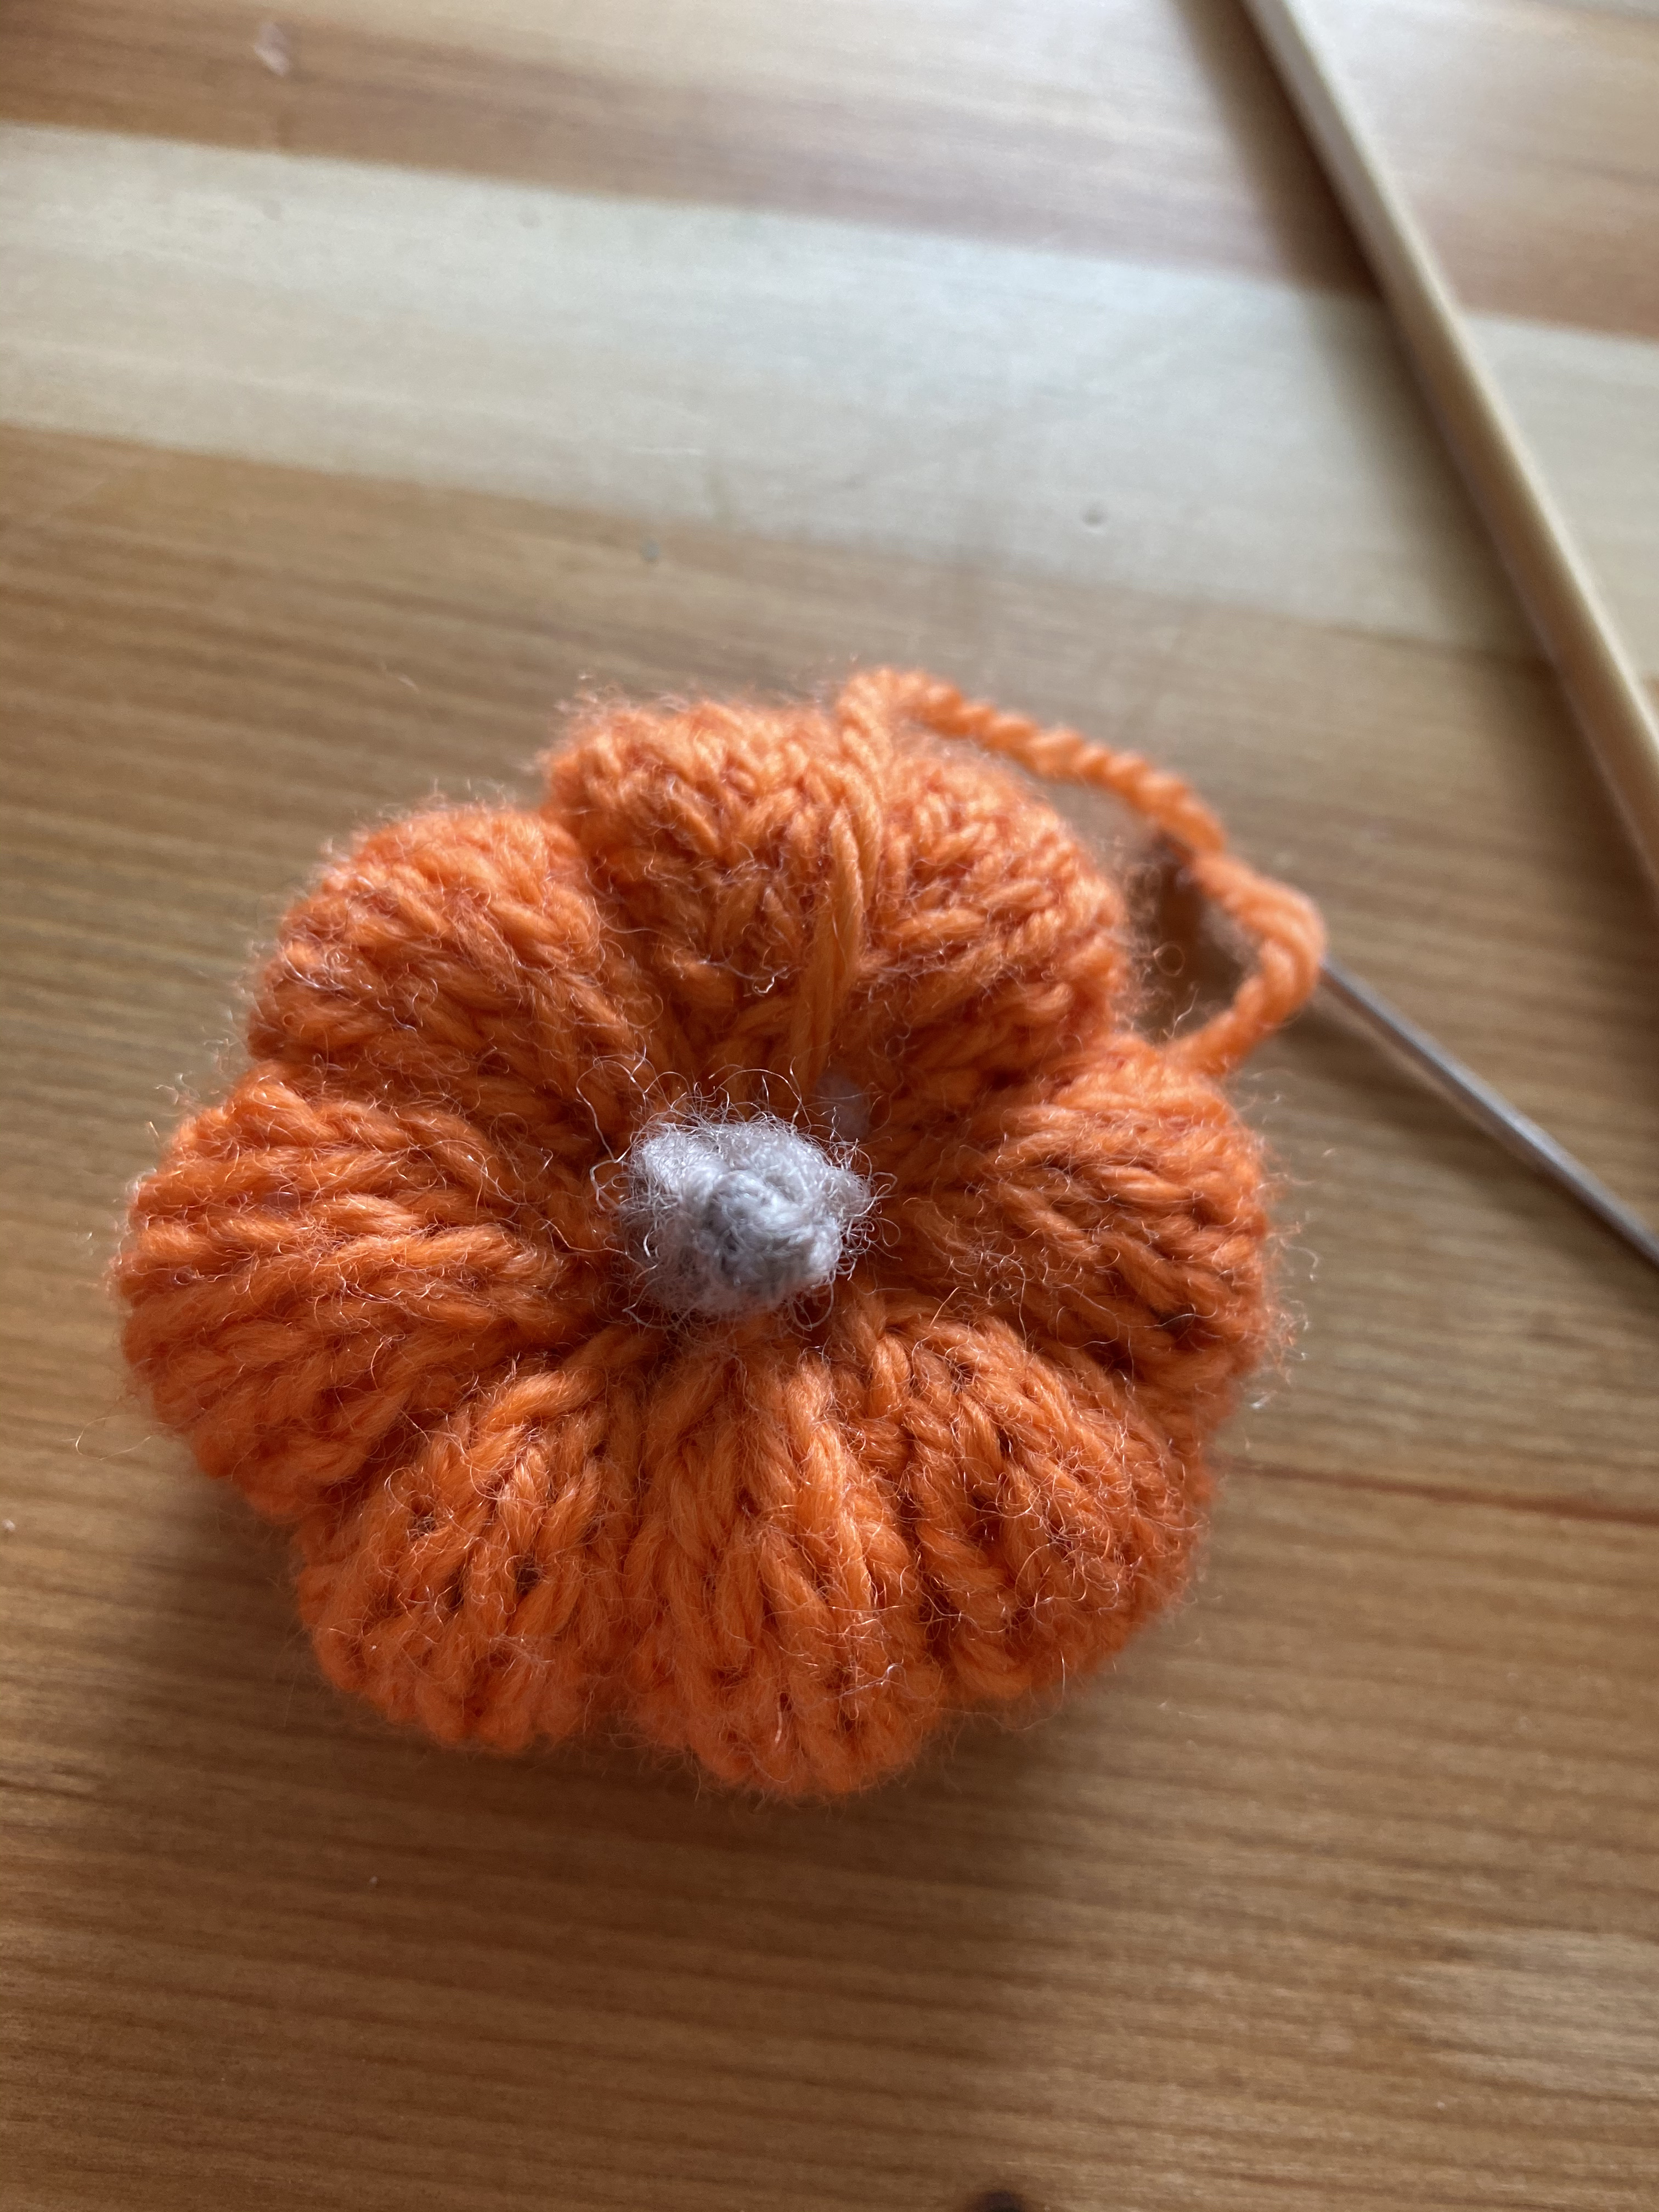
Knit the stem from the above instructions. Stitch the stem to the top of the pumpkin (where you have just threaded the stitches and pulled tight. Carefully stitch up the side seam. Stuff with stuffing. Run a running stitch around the bottom of the pumpkin, and pull the yarn to close the bottom. Following the purl lines, stitch through the centre of the pumpkin and around the sides, and into the bottom, to pull in the bottom to the top.

Leave a comment